|
Velvet has the reputation – and deservedly so – of being difficult, even terrifying, to work with. It has been a high-status textile for centuries, and was a favourite of the Edwardian era, especially for dressy day gowns, dinner or reception gowns. There is little doubt that a velvet garment can be stunning and beautiful, but some skill and understanding is required to make one that fits and drapes well. My purpose here isn’t to delve into the history of velvet or velvet fashions, but to give you some tips on how to work successfully with this challenging material.  A 1911 afternoon or dinner gown of deep blue velvet. First, it's helpful to take a look at the velvets on the market today. There are four general types appropriate for garment-making. It’s important to know their qualities to be able to understand how to sew with them:
Other velvets do exist – such as mohair velvet, wool velvet, heavy silk velvet, etc. – but these are mainly for decorating uses (wool velour is a different type of textile, but not a substitute for the velvets mentioned above). The silk and silk/rayon velvets tend to come in narrower widths of about 107-115cm (42” to 45”), whereas the rayon, polyester, and cotton types are often sold in wider widths. All velvets, except for some of the stretch polyester or cotton/polyester types, should be dry-cleaned. None of the finer velvets can be successfully hand-washed. Bear this in mind when deciding on a garment to make from velvet. For reproducing historical garments, the silk/rayon or pure rayon or viscose types are the most desirable from the point of view of reproducing the beauty of an antique velvet garment. Antique silk velvet was actually somewhat heavier and slightly stiffer than modern rayon/silk types, but today's rayon/silk velvets reproduce the surface lustre and effect of antique velvet better than polyester does. Quality cotton velvet can be a good choice to replicate an antique design as long as not too much draping, pleating, or gathering is involved. Cotton velvet, being slightly heavier and a little stiffer, is best for simpler, more structured designs with few gathers, pleats, or draped effects. Otherwise, it can tend to be rather “thick” looking and unflattering when worn. Stretch velvet or velour of any type is really not a good choice for reproducing an antique design, unless you underline the entire garment with a stable fabric (such as silk organza or fine cotton muslin). Polyester velvet can be uncomfortable when worn, since it doesn’t “breathe” as the cotton, rayon, viscose or silk types will. Keep this in mind, especially if you don’t plan to wear cotton or linen undergarments. An evening spent in a polyester velvet gown in a warm, crowded room can become very unpleasant! Any of these velvets can be produced commercially as “crushed velvet”, that is, where the soft pile has been deliberately (usually randomly) crushed flat here and there, making it stand out as a pattern not unlike the effect of jacquard, but on the surface rather than in the weave. There is also cut velvet, dévoré velvet, even printed velvet, etc. These are expensive textiles and all need to be handled with the same general techniques as regular velvet. The Essence of Velvet – Nap Working with velvet is all about understanding nap. Nap is the direction of the pile (the “fuzzy” surface part of the velvet) along the length of the fabric. In velvet you can feel this difference by gently running the back of your hand lengthwise (i.e. parallel to the selvedges) along the pile in one direction, then in the other. Going “against the nap” the surface will feel a bit rough, whereas going “with the nap” will feel smooth and silky. Nap is different from a fabric’s grain, in that the nap refers only to the surface, not the weave itself. Woven velvets (at least their reverse side) will have a lengthwise and crosswise grain (warp and weft) in addition to a nap. Stretch velvets often have a knitted backing and therefore no actual grain. Which way you want the nap to run in your finished garment will determine how the garment will look when worn, i.e. how the light hits the velvet. I like a velvet garment to run against the nap from top to bottom, as it tends to give a deeper, richer, more consistent colour. If the garment runs with the nap from top to bottom, the fabric will appear slightly lighter in colour, the light reflections will be a bit more broken up and the surface will appear less consistently the same colour, with silvery highlights. Which effect you prefer is a matter of personal choice. Whichever nap direction you decide to use for your velvet garment, it’s absolutely essential that all pieces be cut in that same direction. This is called a “with nap” layout. (I’ll explain more about this later). Preparing Your Velvet for Cutting Out Once you understand the concept of nap, you can appreciate how carefully it needs to be handled. Any pressure or crushing will leave a mark. This is why velvets are usually sold in stores either on a large roll, or loosely hung from the selvedges in soft folds, rather than in a flat bolt. Still, when you go to start cutting out your velvet fabric, you may find some creases or wrinkles. 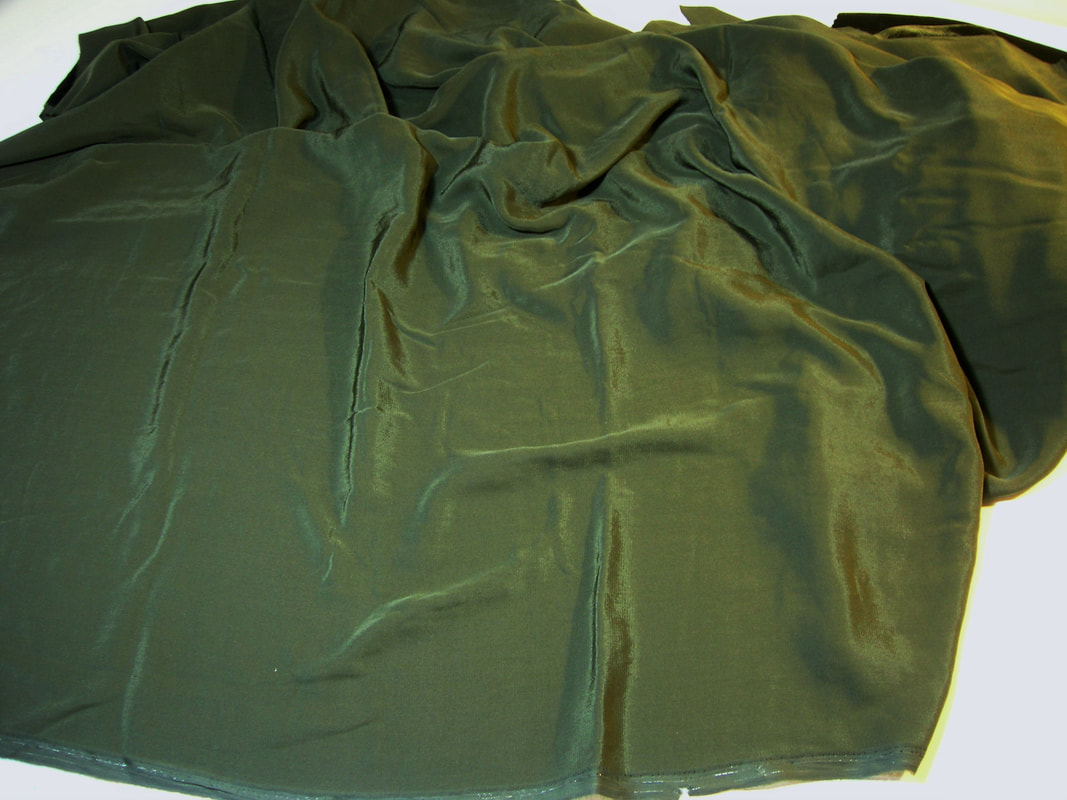 The starting velvet piece, showing both vertical and horizontal creasing from storage. In the example here, I’ll be dealing with a silk/rayon blend velvet, one of the more sensitive and challenging of the velvets to work with. The first thing to do is to find an appropriate supporting fabric to place on your ironing board, under your velvet fabric. You don’t absolutely need a velvet board (a sort of spiky pad that is put under the velvet when ironing), and velvet boards can be expensive items. A thick bath towel with a very closely-woven surface can work as a substitute for a velvet board (a velour towel is even better), or a large rectangle of cotton velveteen or polyester velvet. My favourite “nap protector” is simply two or three layers of thick, soft, cotton flannelette. Whatever support you choose, make sure you test a small sample of your velvet first, using the procedure described below. If you notice any marks or crushing, try a different support. The main thing is to choose a nap support that has no obvious weave, grain, or surface irregularities, as they may “imprint” these patterns into the velvet as you work. A support piece that covers most of your ironing board is ideal, but a smaller piece can be used – you’ll just need to work on small areas of the velvet at a time. Once you’ve chosen a support piece, lay it out on your ironing board and smooth it with your hands. Give it a pass with a steam iron to remove any wrinkles – if you don’t, the wrinkles could impress themselves into the velvet. In the photo below, I’ve shown a tightly-woven bath towel with a thick but fairly low nap. I’ve smoothed it over the ironing board as evenly as possible. It’s very important to keep any fancy borders, hems, or other decorative parts of the weave of your support fabric away from the main work surface. The surface must be smooth and even across the entire area.  Set your iron for the lowest setting that will produce steam. On my iron, this is the “Wool” setting. Set the steam to about 1/3rd of maximum to start with.  Work on small areas of the velvet at a time. On this piece, I worked from end to end lengthwise on the yardage, on half the width, treating a small section at a time, then turning the piece and working lengthwise down the yardage in the other direction. Place the first section of your velvet face down on your support. Smooth the section with your hands as much as you can:  Once your iron has heated up enough to produce steam, pick it up and glide it evenly but not too quickly just barely above the surface of the wrong side of the velvet, letting the steam do the work. Think “hovercraft” – that’s what the initial pass should be like, absolutely not actually ironing the fabric itself. Go over the section once with the steam iron, in loose circles, smoothing the fabric flat with your hands if necessary. Then go over it again, hovering along the piece back and forth, working across the grain. Use only a moderate steam setting, just as much as needed to release wrinkles.  Notice that I've deliberately placed the patterned edge of the towel away from the ironing surface to avoid having them get "impressed" into the velvet. The iron is steaming, just hovering above the wrong side of the velvet. By this point the back of your velvet should be showing signs of being smooth and free of wrinkles. Pull up a corner of the velvet and check to see if the pile looks smooth. Keep in mind that the surface of velvet is almost never absolutely perfect. It’s better to under-do this process than to overdo it. However, if it still appears wrinkled, smooth the piece back down over the support, and hover-steam again. Allow the first section to sit and air out a moment before moving on to the next, and repeat for the full length of the yardage, making sure each time that the support underneath lies smoothly. Once you’re done, either lay the velvet out flat on a table for a couple of hours for the nap to “settle” into its smooth state, or hang the piece from the selvedge along one edge, using laundry clips or clothes pins to hold the selvedges to the hanger (if the piece is long, you may need to gently fold the selvedge edges together). Cutting Out Velvet If your pattern calls for all the garment pieces to be laid out on lengthwise folded fabric, you’re in luck! Decide which nap direction you prefer, then simply lay the pattern pieces out, using a “with nap” layout, i.e. being sure to have all pieces facing in the same direction. In other words, the top of all pattern pieces must be facing the same way. If your pattern has a piece or pieces that are too large to be cut in the usual way on lengthwise folded fabric (as is the case with the skirts of many antique garments), you will need to use a doubled, full-width layout, while at the same time making sure the nap runs in the same direction on both layers. Here’s how to do this, assuming you are laying out a wide skirt piece:
 A large Edwardian skirt pattern, laid out on doubled, full-width (115cm/45”) velvet. The top layer of the velvet has already been turned 180 degrees and set back on top of the lower layer, with right sides together. The straight edge at upper right is the seam to the separate triangular section that will complete the skirt, a typical Edwardian procedure for cutting wide skirts on narrow fabric. Some General Tips on Laying Out Patterns and Cutting Velvet
Marking Velvet Oh, the pain of marking velvet! Tracing paper and a tracing wheel can leave permanent pressure marks, and markings made on the surface of the nap (such as with chalk) are often difficult, if not impossible, to remove. Thread-tracing or tailor’s tacks using ordinary sewing thread can leave permanent stitch marks. So what to do? I find the only reasonable options for marking velvet are:
Sewing Velvet There is almost nothing more upsetting than having to unpick and re-sew a machine seam done in a velvet garment. For one thing, machine stitching will almost always leave unsightly marks in the surface of the velvet, meaning that the re-stitching must be done along a line that is slightly further from the raw edge in order to hide the marks, which can make a difference in fit. Secondly, any puckering or unevenness under the machine needle can result in permanent marks on the velvet – a disaster! Often the only remedy is to re-cut the affected garment piece(s) from a fresh piece of velvet yardage. It’s worth almost anything to avoid these consequences, especially considering the high cost of velvet. Although specialty velvet feet are available for sewing machines, I find they aren’t 100% reliable in keeping two layers of slippery, slithery velvet (especially silk velvet) moving evenly and smoothly under the needle. I have had to unpick seams carefully sewn in velvet with such a foot, so I no longer use it. As time-consuming as it may seem, I prefer to hand-baste all seams in a velvet garment before subjecting them to the sewing machine. And not with just any sewing thread either! My preferred thread for this purpose is Clover (or Tire) Size #50 or even #100 pure silk thread. This thread slides easily through velvet when hand-sewn and can be usually be removed from velvet without leaving marks. I can’t recommend this method strongly enough – it will prevent many needless heartaches when sewing velvet! One tip: Once you’re actually machine-sewing the seam, if your machine has a feature that allows the needle position to be moved, do use it! By positioning the needle two or three steps toward the seamline, your machine’s foot will fall a little further away from the seamline while you sew. This will reduce the downward pressure on the velvet just outside the seam, making it less likely that the presser foot will cause crush marks on the area beyond the seam that might be visible on the right side of the velvet. So what happens if a seam does need to be unpicked? If you've machine-sewn a seam in velvet and realize it's wrong, the best advice is to unpick it -- immediately and carefully -- then use the "hover-steaming" process described earlier to try to ease out the stitch marks from the wrong side. Be careful when unpicking not to pull on the threads unduly, as that pressure can make the marks worse. Just work gently on the reverse, using a good, sharp stitch ripper, a few stitches at a time, removing the thread with tweezers as you go. Interfacing Velvet I recommend using a lightweight woven interfacing with velvet, applied by hand-basting all around the edges, within the allowances. If you feel you absolutely must use a non-woven, fusible interfacing, it's best to fuse the interfacing to a matching piece of lightweight silk organza, fine cotton percale, or silk taffeta, and then hand-baste the fused piece to the velvet piece. Finishing Seam and Hem Allowances in Velvet I prefer to pre-finish all raw edges of a velvet garment with serging before beginning to sew. I use the widest feature on my machine (4-thread serging). Why serging? For one thing, serging will prevent the edges from fraying and little bits of velvet fuzz from escaping everywhere while you're working. Secondly, and more importantly, it stops further stretching or distortion of raw edges while you work. Although obviously this isn't an historically correct finish, I feel the advantages a serged edge on velvet provides are important enough to justify this "cheat". I have found that ordinary machine zig-zag or overcasting can give a messy result on velvet that can be difficult to control. The advantage of a serger is that the raw edge of the velvet will feed smoothly and the finished serging will lie flat. If you don't own a serger, the next best thing is hand-overcasting, preferably in silk thread. Pressing the Seam Allowances: Once you have the raw edges of velvet seam allowances serged, be extremely careful about pressing! The safest method is to gently finger-press the allowances open, then use the "hover-steam" method described above to gently ease them flat, with a lightweight cotton press-cloth between the allowance and the back of the velvet. Never put any pressure on the seam allowances with the iron. If you do, it will probably create a permanent, visible ridge on the outside of the velvet. Hemming a Velvet Garment When hemming a velvet garment, try to keep the hem allowance to no more than 7.0cm (2-3/4 inches). A deeper hem will be more difficult to keep in place without pulling or distorting the skirt edge, due to the weight of the velvet. Consider underlining your velvet skirt with a lightweight silk organza or china silk, etc. (see the section on underlining further on), as it will make the job of hemming much easier. Not only will the underlining provide a little more structure and stability to the hem, but it will give you something to "grab onto" while hand-stitching the hem, without having to go through to the right side of the velvet itself with every stitch. Carefully measure and mark the hemline on the wrong side (use a fade-fast pen), or by hand-basting on the right side with a slightly contrasting silk thread. Finish the raw edge of the hem with serging if possible. For a straight hem, simply turn up along the hem line (do not press with an iron!) and hand hem on the wrong side, preferably with silk thread in a closely matching colour. Check as you work to make sure your stitches aren't showing on the right side. If they do, make tinier hand-stitches, barely picking up a couple of threads of the velvet back each time. If you're dealing with a curved hem, you'll need to shape it first. Do this by carefully running a line of long (6mm) machine-stitching all around the hem, just in from the serging. Turn up the curved hem, adjusting the line of gathering thread (pull it up with the blunt end of a needle) just enough to make the inside top edge of the hem allowance fit the curve of the skirt. Be careful pinning -- use only as many pins as are necessary to keep the hem edge from slipping, and keep the pin heads over the hem allowance (where there is a double layer of cushioning), not over the skirt itself. Then hand-sew the hem in place using a slip-stitch or herringbone stitch, preferably in fine (#50 or #100) silk thread. Herringbone stitch my preference, as it will securely hold the heavy velvet in place. Never press a velvet hem with an iron. Simply allow the hem to "set" on its own. Sewing Bias Satin Binding or Edging onto Velvet Unfortunately this is an almost impossible task to do on a machine unless the velvet is well supported by a firm underlining or interfacing and you work very slowly. Normally, my best advice would be to apply the binding by hand. There are two ways to do this:
In either case, one pressed edge of the bias satin band is hand-sewn (with right sides together) onto the edge of the velvet garment in a 1.0cm (3/8") seam, then the band is turned over the velvet edge and slip-stitched onto the wrong side. The series of photos below shows method #1 (where the wrong side of the garment will be unseen). Of course, bias binding is not just for silk velvet, but on regular woven fabrics the bias can be sewn on by machine. Click on "Play" to run the slideshow automatically. You'd be surprised how quickly this hand work can go, considering how tedious and time-consuming it is to set it up to be sewn by machine, and how slowly you need to work to keep the machine's foot from slipping off the edge of the velvet or the satin from sliding away. There are some things that are just better done by hand! Underlining Velvet Underlining is sometimes called “flat-lining” in online blogs, etc., but “underlining” is the correct technical dressmaking or couture term for a backing material basted directly to a fashion fabric. To my mind, the best underlining for velvet is lightweight silk organza. I use fine 100% silk thread for basting underlining onto velvet garment pieces. The silk thread holds the two layers together while you work, but the basting thread can be slipped out easily if desired once the garment seams are sewn. Underlining is a good idea with velvet, as you can mark or make notations on the underlining without being concerned about them showing through. It also provides structural stability as well as strength at the seams. When underlining a velvet section, always work on a flat surface to lay out the underlining onto the velvet, as well as when hand-basting the edges together. Be sure that all hand-basting is within the seam allowances. Remember that velvet has a less stable grain than most ordinary woven fabrics, so you’ll need to carefully lay out the velvet on your table (wrong side up) before placing the underlining on top. Have your pattern piece close at hand to double-check that the outline is accurate before pinning the underlining on. As with laying out pattern pieces for cutting, keep your pins within the seam allowances. Once your velvet pieces have been underlined, the two layers are treated as one in all further construction.  One bodice back section of an Edwardian velvet gown, with silk organza underlining basted to it in fine silk thread. The basting on the forward edge (along the bottom of the photo) is very close to the edge of the fabric as this edge has only a narrow 1.0cm (3/8”) allowance for finishing.  Close-up of hand basting, from the underlined side. This basting doesn’t need to be attractively done, as long as it holds the two fabrics smoothly together. Seam Allowances for Velvet Garments If you’ve ever worked with one of my “History House” sewing patterns, you’ll know that I recommend wider seam allowances (2.0cm [3/4”) than the big commercial pattern companies do. This is because they allow better control of raw edges on challenging fabrics such as velvet. On ordinary woven fabrics, wider allowances also leave room for minor fit alterations during construction. If you’re using a sewing pattern that has the standard commercial allowances of 1.3cm (5/8”) already included, I would strongly recommend extending these to 2.0cm (3/4”) when you cut. If your pattern shows seamlines only (i.e. doesn’t include allowances), then you can easily add 2.0cm (3/4”) allowances on the pattern itself before cutting. Because velvet has a naturally “wobbly” hand, and rather unstable grain, the slightly wider allowances will give you better control when sewing the seams (especially on bias edges), and more leeway for pinning. Embellishing Velvet If you’re planning to apply any surface embellishment on velvet, it’s a good idea to underline the pieces beforehand. I find the best underlining for supporting velvet is silk organza, but a very lightweight muslin or voile will work too. Machine-embroidering on velvet is a tricky business – almost any embroidery foot may leave permanent crush or pressure marks. Also, the stabilizer usually required to be used with machine embroidery will adversely affect the beautifully soft drape of velvet. This may be an important consideration unless you’re planning to embroider a simple, flat, structured area without draping, such as the front panels of a jacket. Make sure you do sufficient testing on your chosen velvet fabric before committing to machine-embroidering an entire piece. For hand embroidery on velvet, a safe (if rather tedious) technique is to mark or transfer the design onto the underlining fabric before basting the underlining to the velvet piece. Use a fine silk or cotton thread matched closely to your embroidery floss, and carefully outline the entire design with small running stitches, through underlining and velvet. You will then be able to follow the lines from the right side of the velvet when embroidering.  Step 1) The design has been traced onto the silk organza underlining (backing) before the underlining was basted to the velvet piece.  Step 2) The design has been thread-traced from the back, through through underlining and velvet in silk thread a little lighter than the velvet colour.  Step 3) The embroidery completed in DMC cotton floss, with applied sequins. Another method for transferring an embroidery design on velvet is to use a fade-fast pen to hand-draw the design on the face of the velvet if it’s a light colour. This works best if the design is fairly large and not too dense. Be sure to test the marker you plan to use on a scrap of your velvet, to be sure it will actually fade. (Be aware that marks made with a fade-fast pen may take up to 3 or 4 days to fade completely, although they should begin to show signs of fading with 48 hours). The one drawback to this method is that you’ll need to work on a small section at a time, drawing the design and completing the embroidery within a day or two, before the marks fade away. Sewing Bias Seams in Velvet This is probably the most challenging part of sewing a velvet garment, especially if there is a combination of bias and drapery involved. A “full bias” edge is one that runs diagonally (at a 45 degree angle) across the grain of the fabric and is the most elastic. Semi-bias edges run along a narrower angle on the fabric, but are still less stable than a straight grain edge. Curved, circular, and semi-circular edges (for example, on flounces and some skirt hems) are also bias in nature. All bias edges have a natural stretch or “give” even in ordinary woven fabrics, and will naturally resist fraying. In velvet, bias stretch is more pronounced, and must be handled carefully and delicately. A phenomenon called “bias explosion” can happen at bias edges being seamed together. This refers to the tendency of such edges to stretch or distend more at the raw edge than slightly further in. As a result, the finished seam can look puckered and distorted, or end up longer than it should be. The best way to control bias seams on velvet is to cut the pieces that have bias seams with extra-wide seam allowances (up to about 2.5cm [1 inch]), and to hand-baste the seams prior to machine stitching. In fact, a hand back-stitch is the ideal means to construct bias seams in velvet. Adjusting the Fit of a Velvet Garment Sadly, there is no completely safe way to adjust the fit of a velvet garment during construction. Taking a chance of sewing along the marked pattern seamlines without being certain of the fit can result in a sewing disaster, since a seam once done in velvet (especially by machine) is almost impossible to remove without leaving permanent marks. Using the finest (#100) pure silk thread to hand-baste seams for a try-on fitting may work, but there is always the possibility the thread will leave stitching marks in the velvet. If you need to take the seam in, this is no problem, but if you need to let it out, the marks might show. If you do plan to hand-baste seams, test on remnants of your velvet before using it on the garment pieces themselves. The best answer? A toile (mock-up)! Use muslin or other inexpensive fabric to make a rough “draft” of your garment, on which you can check and unpick seams and make notations for changes that need to be made to the paper pattern before you cut into your velvet. It’s worth every effort to avoid making mistakes in the final garment, especially with the high cost of finer velvet. Incidentally, it’s rarely necessary to make a toile of the entire garment, using all the pieces. Normally only the main bodice pieces need to be tested, along with one sleeve (only if you have concerns about the fit of the sleeve). Sometimes a half-body toile of the bodice is sufficient, especially if the design is not closely-fitting. A toile of a skirt need not be made full-length; you only need to cut the skirt pieces to just below lower hip level unless you have a concern about skirt length or overall drape. If you’ve made a toile, you can go on to sew the final velvet garment with confidence, knowing it will fit you without having to struggle with adjustments during the construction process that might leave unsightly marks on the surface.  A toile of the bodice of a 1910 velvet dinner gown, with the embroidered lower front section pinned onto what will be the lace-covered foundation. Note that only one sleeve needs to be made up to check the fit.  The 1910 fashion sketch of the bodice shown in the toile above.  The 1910 replica velvet gown. (I omitted the embroidery on the bodice itself due to time constraints). Try Velvet! Although velvet – and especially silk or rayon types – are a challenge to work with, I hope these tips will give you the confidence to take the leap and make that beautiful velvet garment you’ve always wanted to sew! If you have any questions, or would like any further explanations, please feel free to post in the comment section below, and I'll respond as soon as I can. In the meantime, for more inspiration, here is a replica of an 1884 French ball gown, made in deep plum coloured velvet with purple silk satin contrast and drapery. Click on the "Play" button at the top left of the main image to play through the set of photos automatically, or select a thumbnail. (This pattern will be available soon -- look for it in my Etsy shop in the summer of 2019).
17 Comments
Kim Goreham
13/7/2019 10:39:19 am
This was very informative and helps one to understand the pros and cons of using a velvet in a dress.... thank you for helping us.. 14/6/2022 06:27:58 pm
Thanks so much for your kind comments! I'm so glad it was helpful! 1/6/2021 10:45:47 am
Very nice post. You have shared really impressive information in detail. I would love to read more from you. Keep sharing. 18/5/2022 08:27:08 am
Your blog provided us with valuable information to work with. Each & every tips of your post are awesome. Thanks a lot for sharing. Keep blogging..
Shar
11/6/2022 04:15:55 am
Hi, fantastic informative article! 14/6/2022 06:36:01 pm
Hello, and thanks so much for your lovely comment, I'm glad my article was helpful. As far as washing any particular velvet textile is concerned, the best option is to contact the manufacturer if you can. However, the general rule is that velvets with a silk (or silk-blend) or rayon content should never be washed, even by hand in cold water. The results could be very unpredictable and you may never get the original beauty of the fabric back after washing. These velvets are almost always sold as "dry-clean only", as are the garments made from them.
Cat
22/9/2022 03:08:36 am
I'm looking crush a velvet curtain that I bought so that it has a more silvery look. It sounds like you would recommend WITH the nap. Does that still apply if I'm trying to crush it, as I can move my iron in either direction? Also, do you have any advise for trying to crush velvet, as I've never worked with this material before? Are accordion strips necessary or can I just move across the back? What heat should I work with? Any advice would be amazing! Thank you so much for this incredibly detailed and informational article! 1/10/2022 05:49:26 pm
Hi Cat! I apologize for the delay in replying.
J
1/6/2023 01:09:17 am
What would be the best velvet for a summer weight? Is there a reason linen is not used in garment making for velvet? 25/6/2023 01:18:19 pm
Great question! Traditionally, velvet has been a cool-weather textile, usually featured in daytime designs for fall or winter. Velvet has also long been favoured for evening dresses during cool seasons. There's a good reason for this: velvet is warm to wear!
Christine Smith
17/10/2023 03:30:22 pm
Thank you for this very informative article. I am making an embroidered tree skirt out of a polyester velvet and I'm afraid I may have ruined the side panel by steaming it. I did it from the back and used a cotton sheet as a barrier but there is a fairly large discolored mark on the front now. Is there any way to correct my mistake? 19/8/2024 07:39:32 pm
Hello Christine -- You could try to have the garment dry-cleaned to see if the mark will come out. If it's a crush mark, rather than a water mark, it may not be possible to remove. Polyester velvet is much more sensitive to heat than are rayon or silk, so if the mark is a heat print, it could be permanent I'm afraid. 14/7/2024 06:45:17 pm
I had double sided silk velvet curtains made , the seamstress made a mistake cutting one of them and had to sew seam to join, must have ironed as now have awful markings along the seam - sooo disappointed it was a dream fabric for a very special project and no more of this colour available !! Is there ANYTHING I can do to try and rectify -or I will have to have I side completely replaced as it upsets me so many times every single day - what would be best fabric to replace 1 side with so as not to destroy the beautiful way they drape? Hope so much you can help me ! Marjory [New Zealand]
Patricia Preston
19/8/2024 07:57:19 pm
Hi Marjory -- This is a shame, I'm very sorry! Ironing marks are a recurring problem with anything made of velvet. With curtains I think you have two choices:
Narelle Catling
23/7/2024 03:40:05 am
I am making a three musketeers style cloak for and adult. I have chosen velvet with a satin lining. Is there any way of stopping the fabrics sliding during machine sewing?
Patricia Preston
19/8/2024 08:07:25 pm
Hello! As I think I may have mentioned in my article above, there are specialty sewing machine feet available that are intended to reduce the slippage of fabrics, especially velvets and silks. Check with your local sewing supply shop, or a specialty shop that sells parts for your particular machine. Thank you for such a great post. I upcycle and seem to be in a velvet phase currently as I picked up a few silk blend velvets in charity shops here which I am due to work on. One is 2 large pieces which I an considering doing a bias top with.....but still mulling that one over.....I haven't done a velvet garment in a while but know I will definitely be doing way more hand sewing on these! Your comment will be posted after it is approved.
Leave a Reply. |
AuthorPatricia Preston ('The Fashion Archaeologist'), Linguist, historian, translator, pattern-maker, former museum professional, and lover of all things costume history. Categories
All
Timeline
March 2024
|
 RSS Feed